BlackBerry Parts and Accessories Store
Contact form


BlackBerry DTEK60 disassembly instructions
We offer you a complete instruction on BlackBerry DTEK60 disassembly and repair.

See also: Disassembly instruction BlackBerry DTEK60 (video).

Please note, you take full responsibility for both the process and the result. BlackBerry DTEK60 is very difficult to disassemble even with this instruction. We recommend that you contact a specialized service center if you do not fully understand what you are doing.

Disassembly tools for BlackBerry DTEK60

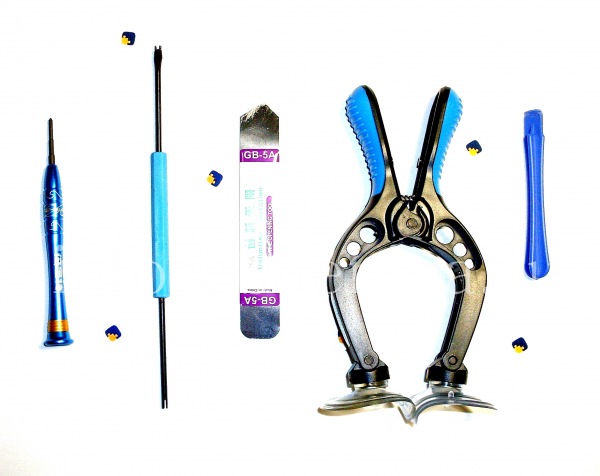
You will need these tools:

  • Screwdriver type ⊕ Phillips
  • Plastic tools for detaching parts
  • Metal tools for detaching parts
  • Suction pliers for removing the cover and screen
  • Metal Hook (Huynya)
  • Heater
  • Needle for extracting the SIM card holder (included in the smartphone package)

Repair Parts for BlackBerry DTEK60

All repair parts for BlackBerry DTEK60 you can find on the corresponding page of the site.

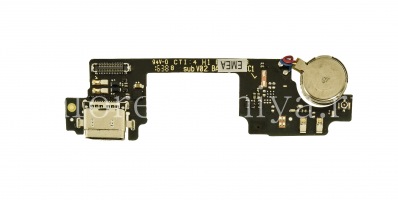
USB Connector (Charger Connector) T18 on microchip with microphone and vibration motor for BlackBerry DTEK60 The upper panel with a voice speaker and antennas BlackBerry DTEK60 Camera main T30 for BlackBerry DTEK60 Ring function button for BlackBerry DTEK60 Motherboard for BlackBerry DTEK60 Original battery TLp030F2 for BlackBerry DTEK60

Device Information:

Shop for Smartphone BlackBerry DTEK60

Development of DTEK protected technologies

As a continuation of BlackBerry DTEK50, DTEK60 model has improved technical characteristics of — screen 5.5 "higher resolution, more memory and processor speed, 21 megapixel camera, 3000 mAh capacious battery and fingerprint scanner .In the rest — is still the same smartphone with Android OS installed and preinstalled applications BBM, Hub, and many others.

Shop for Smartphone BlackBerry DTEK60:

BlackBerry DTEK60 disassembly instructions

BlackBerry DTEK60 Teardown: To disassemble BlackBerry DTEK60 you will need: Screwdriver type + Phillips, Plastic pry tools, Metal pry tools for detaching parts, Suction pliers for removing the cover and screen, Metal hook (Huynya), Hairdryer, Needle for extracting the SIM card holder (included in the smartphone package).
To disassemble BlackBerry DTEK60 you will need: Screwdriver type + Phillips, Plastic pry tools, Metal pry tools for detaching parts, Suction pliers for removing the cover and screen, Metal hook (Huynya), Hairdryer, Needle for extracting the SIM card holder (included in the smartphone package).
BlackBerry DTEK60 Teardown: So, let's start. Take the hair dryer and warm up around the cover of the smartphone. It is fixed with glue, and high temperature will reduce adhesion. It is necessary!
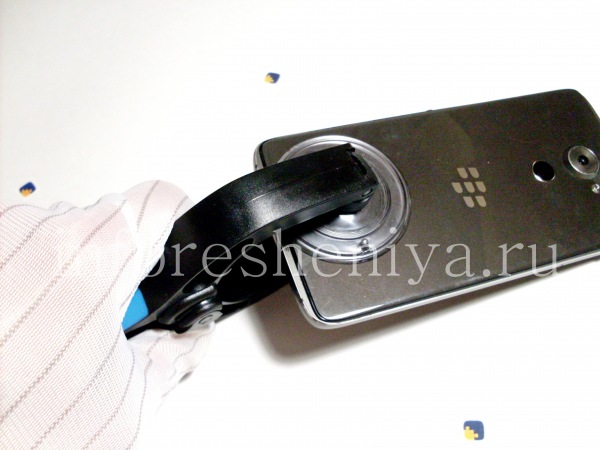
So, let's start. Take the hair dryer and warm up around the cover of the smartphone. It is fixed with glue, and high temperature will reduce adhesion. It is necessary!
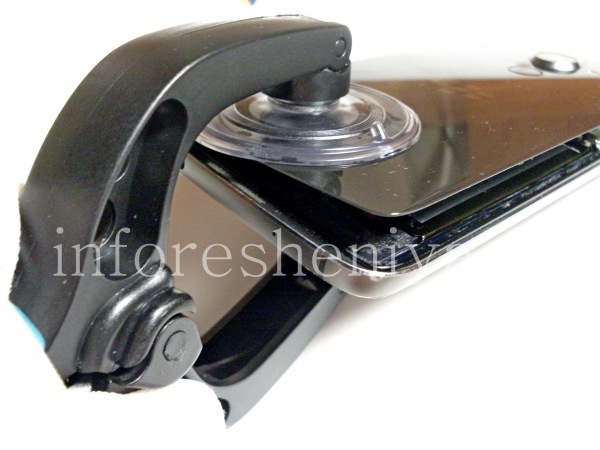
BlackBerry DTEK60 Teardown: Using the suction cups, lift the bottom edge of the DTEK60 cover to allow insertion of the detachment tool.
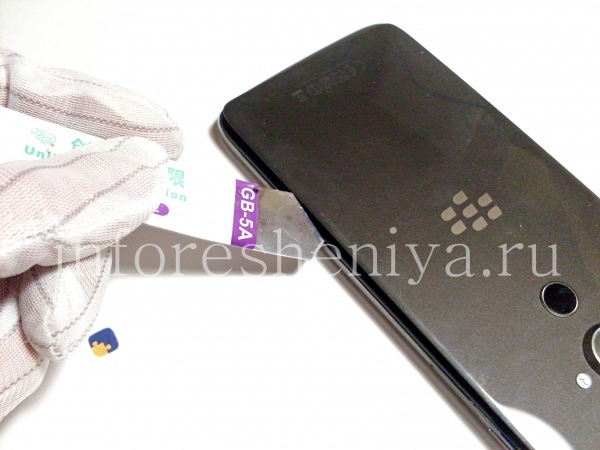
Using the suction cups, lift the bottom edge of the DTEK60 cover to allow insertion of the detachment tool.
BlackBerry DTEK60 Teardown: Use the detachment tool to separate the glue and lift the cover of the device.
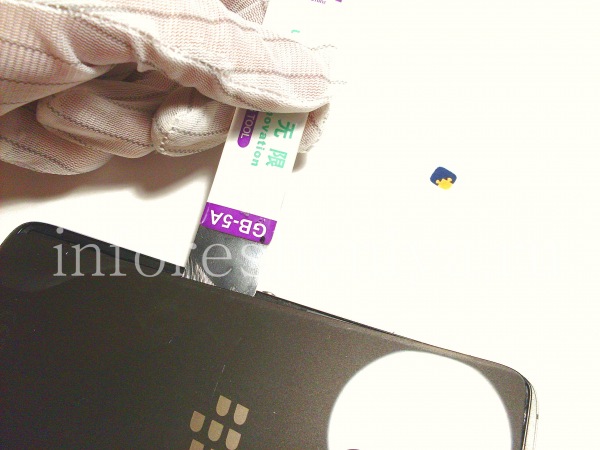
Use the detachment tool to separate the glue and lift the cover of the device.
BlackBerry DTEK60 Teardown: Do it all along the perimeter.
Do it all along the perimeter.
BlackBerry DTEK60 Teardown: Then you can use the suction cups to raise the back cover. Be careful, it made of glass and can crack.
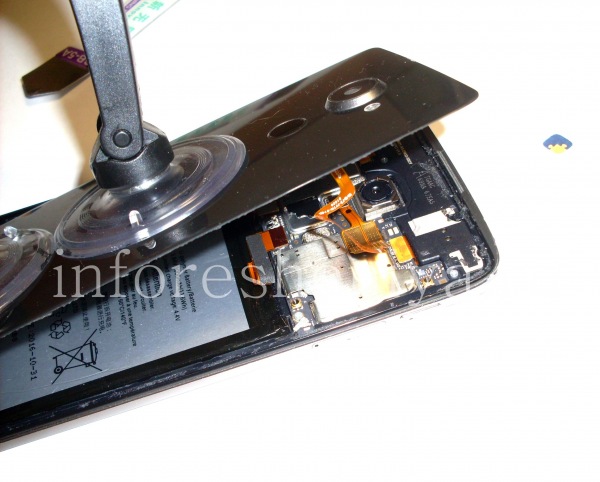
Then you can use the suction cups to raise the back cover. Be careful, it made of glass and can crack.
BlackBerry DTEK60 Teardown: Do not remove the cover by abrupt movement — you need to unfasten the connector of the fingerprint scanner.
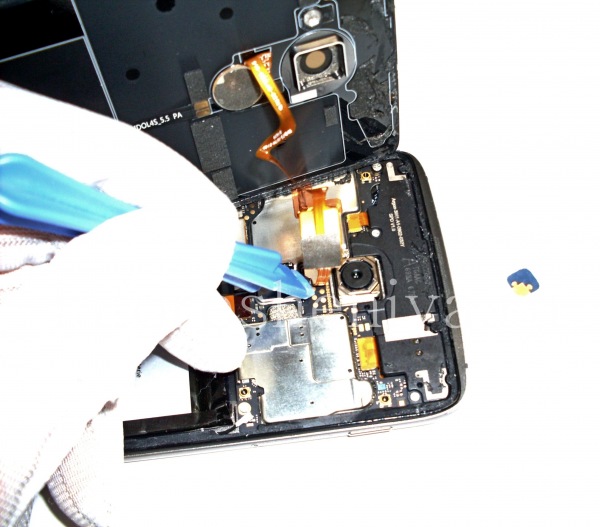
Do not remove the cover by abrupt movement — you need to unfasten the connector of the fingerprint scanner.
BlackBerry DTEK60 Teardown: Detach it with a plastic pry tool.
Detach it with a plastic pry tool.
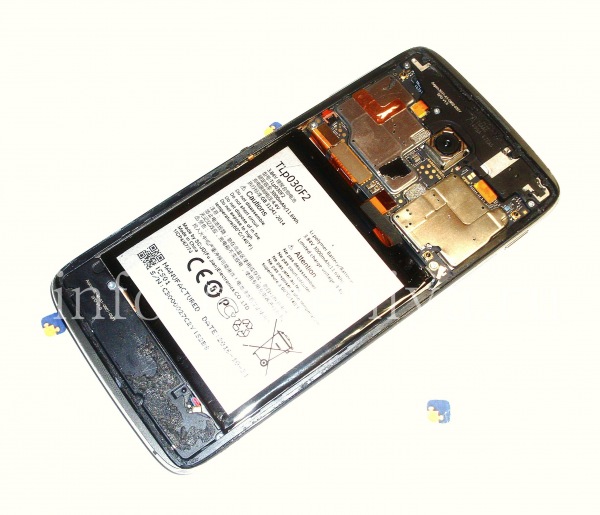
BlackBerry DTEK60 Teardown: BlackBerry DTEK60 with the back cover removed.
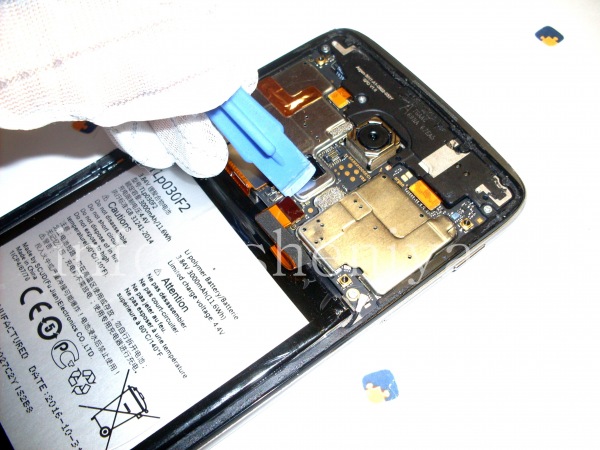
BlackBerry DTEK60 with the back cover removed.
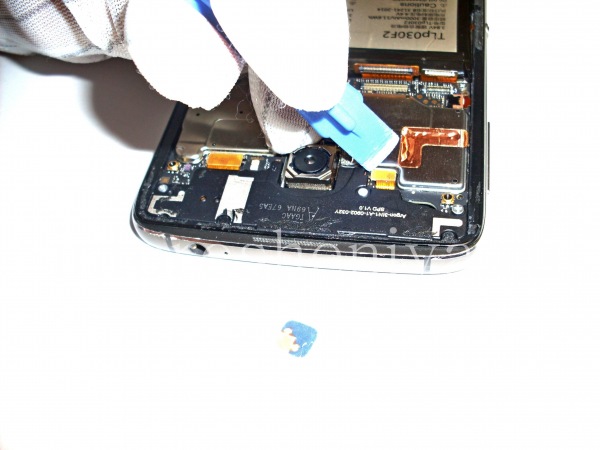
BlackBerry DTEK60 Teardown: Use a plastic pry tool to consistently unclip all the connectors. Start with the battery connector.
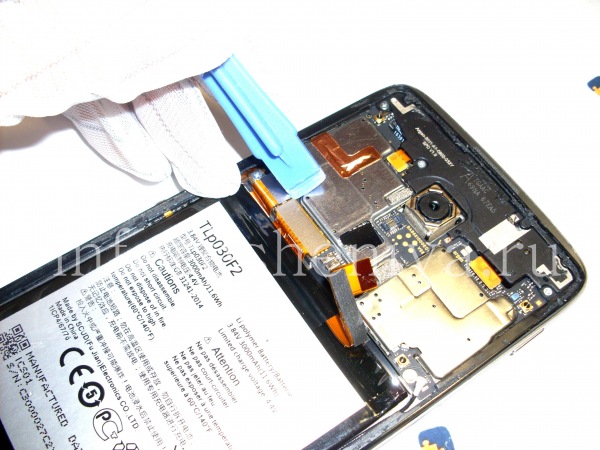
Use a plastic pry tool to consistently unclip all the connectors. Start with the battery connector.
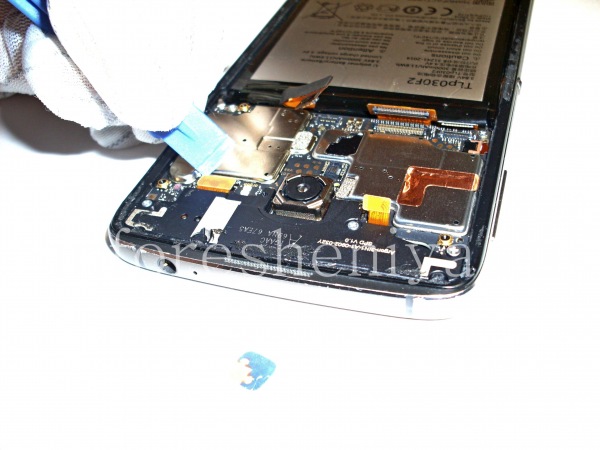
BlackBerry DTEK60 Teardown: Then the screen / touchscreen connector.
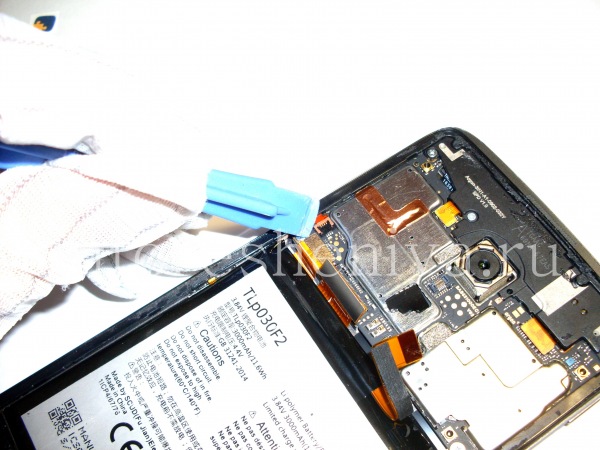
Then the screen / touchscreen connector.
BlackBerry DTEK60 Teardown: Connector of communication cable..
Connector of communication cable..
BlackBerry DTEK60 Teardown: LED indicator connector..
LED indicator connector..
BlackBerry DTEK60 Teardown: Audio, sensors and power button PCB connector.
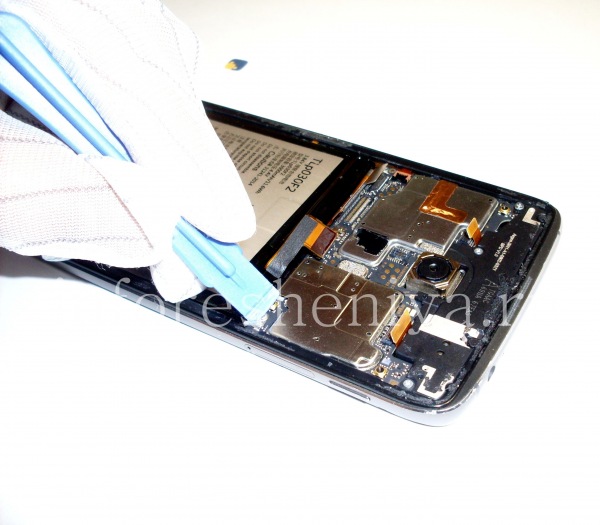
Audio, sensors and power button PCB connector.
BlackBerry DTEK60 Teardown: Connector of antenna cable.
Connector of antenna cable.
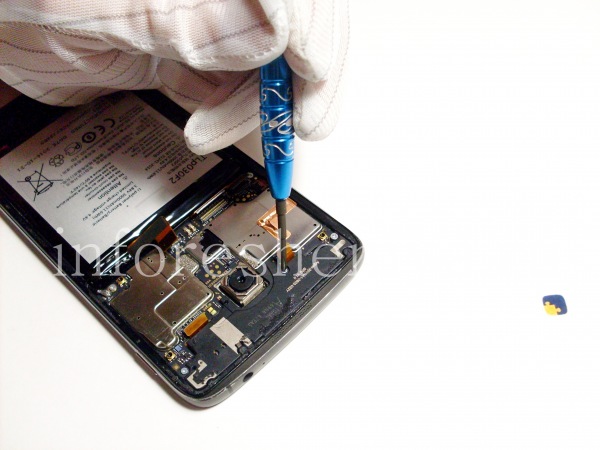
BlackBerry DTEK60 Teardown: Next, take a Phillips screwdriver + and unscrew the visible screws.
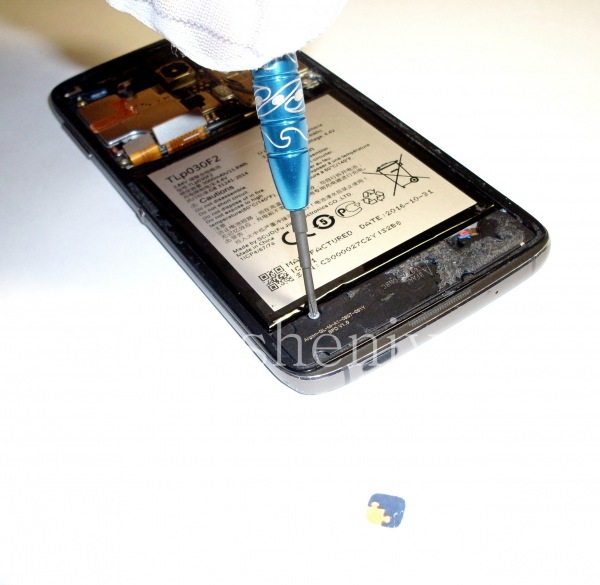
Next, take a Phillips screwdriver + and unscrew the visible screws.
BlackBerry DTEK60 Teardown: They are on bottm and top of the device.
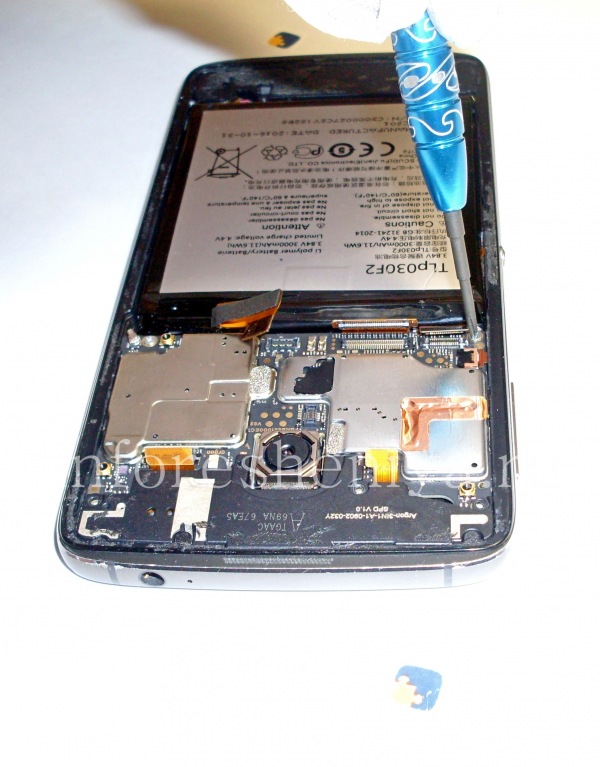
They are on bottm and top of the device.
BlackBerry DTEK60 Teardown: Screwing..
Screwing..
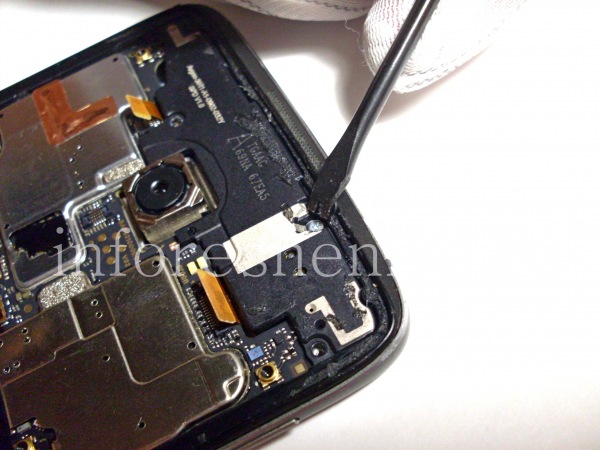
BlackBerry DTEK60 Teardown: Please note there are also hidden screws. That's how to raise the plastic bezel.
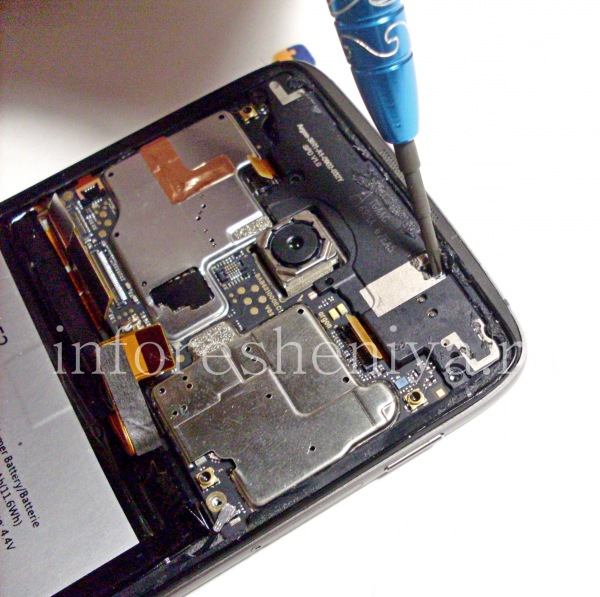
Please note there are also hidden screws. That's how to raise the plastic bezel.
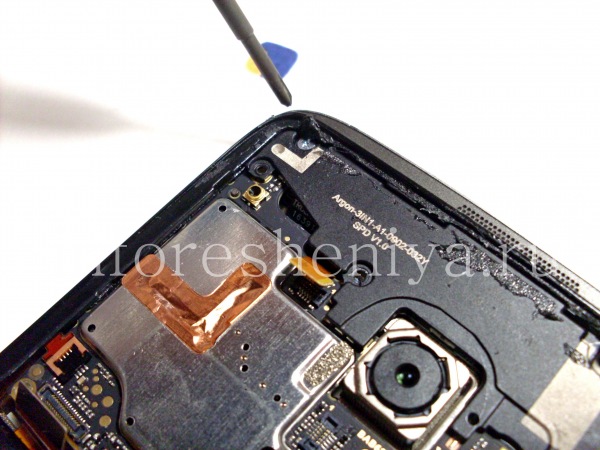
BlackBerry DTEK60 Teardown: Remove the screws under it.
Remove the screws under it.
BlackBerry DTEK60 Teardown: Similarly for other locations of hidden screws.
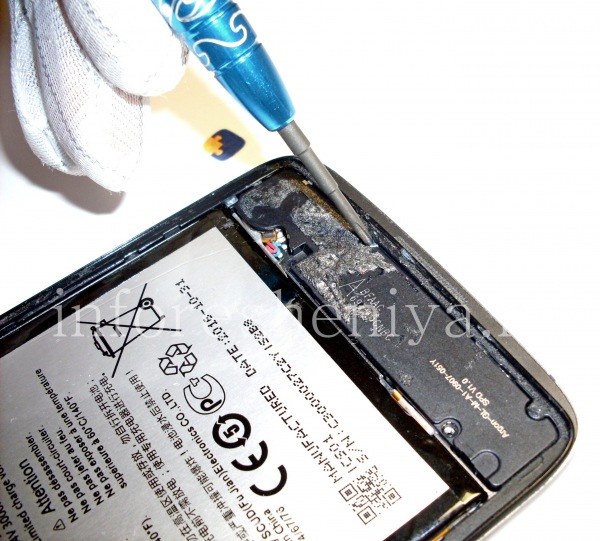
Similarly for other locations of hidden screws.
BlackBerry DTEK60 Teardown: There are such screws on bottom side also.
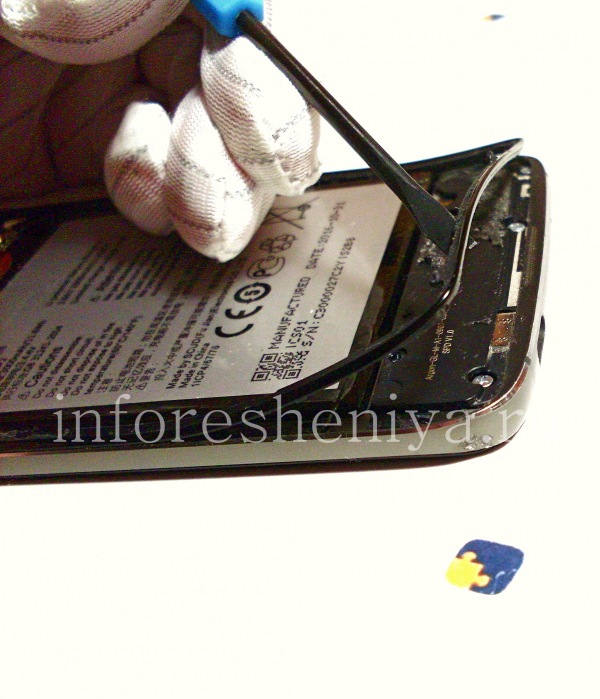
There are such screws on bottom side also.
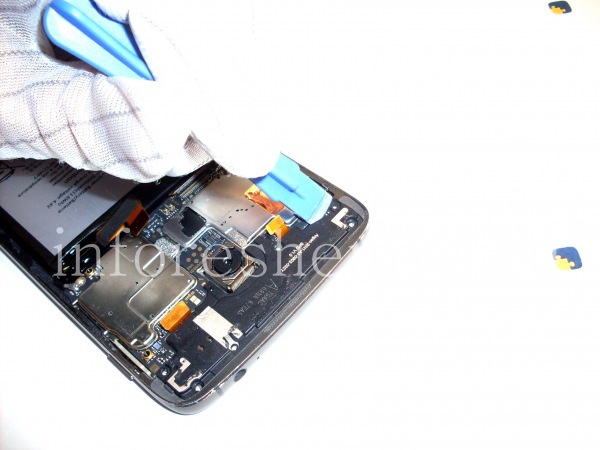
BlackBerry DTEK60 Teardown: The plastic bezel can be removed. This can be done first, but it is possible to do it after deal with screws.
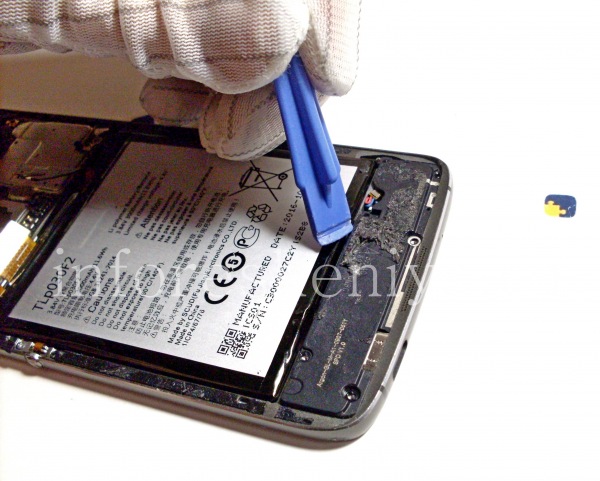
The plastic bezel can be removed. This can be done first, but it is possible to do it after deal with screws.
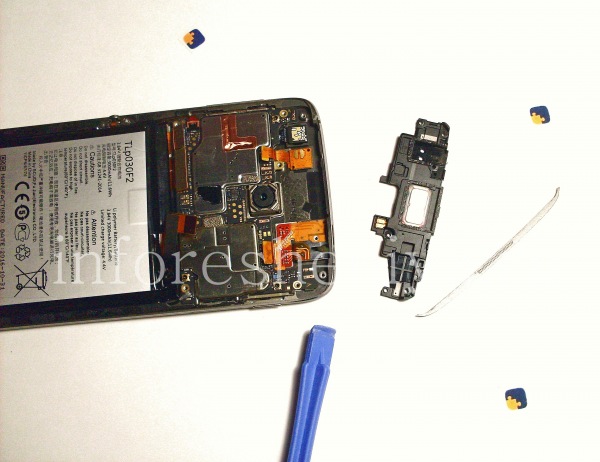
BlackBerry DTEK60 Teardown: Pick up the bottom panel with the media speaker and remove it.
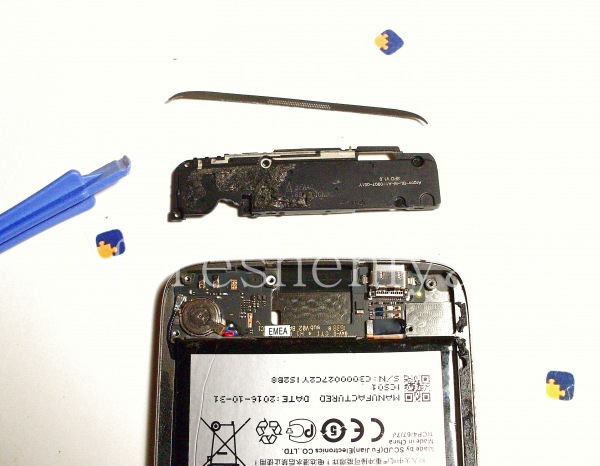
Pick up the bottom panel with the media speaker and remove it.
BlackBerry DTEK60 Teardown: Done.
Done.
BlackBerry DTEK60 Teardown: The same with the top panel.
The same with the top panel.
BlackBerry DTEK60 Teardown: The upper panel with the voice (voice) speaker is removed.
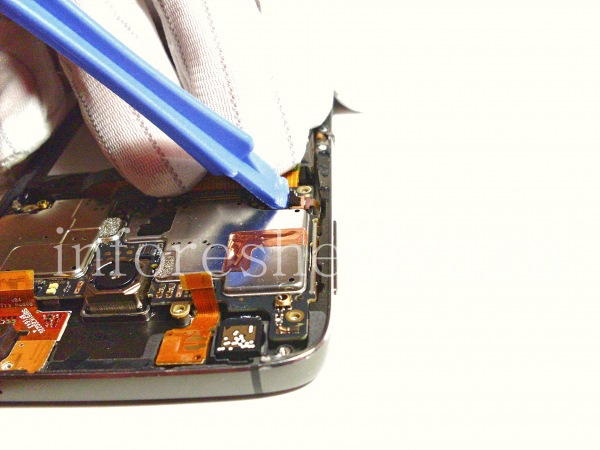
The upper panel with the voice (voice) speaker is removed.
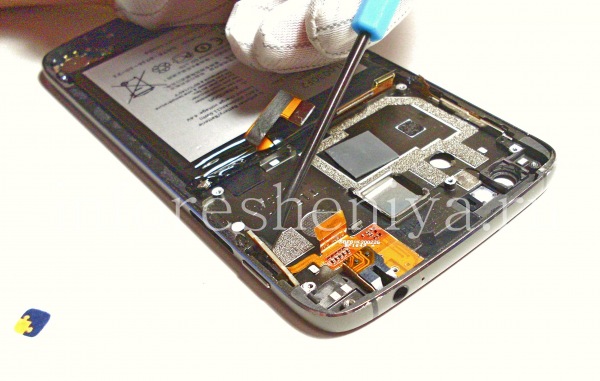
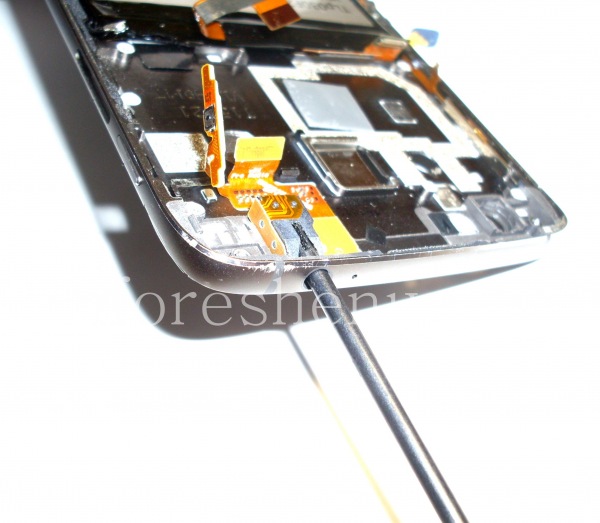
BlackBerry DTEK60 Teardown: Detach the connector of the side buttons.
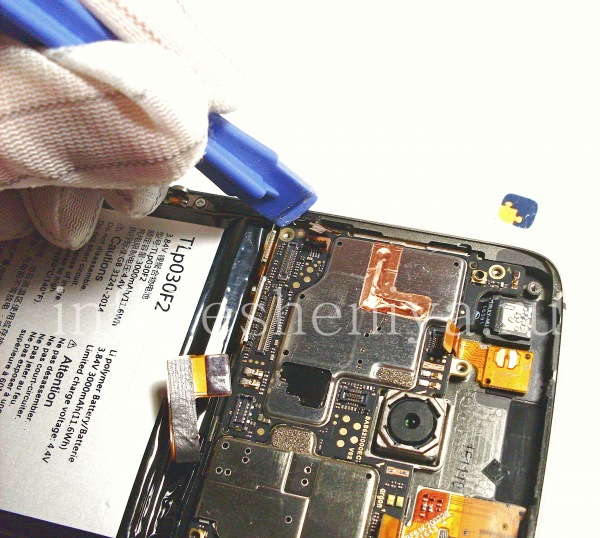
Detach the connector of the side buttons.
BlackBerry DTEK60 Teardown: Now we remove the DTEK60 motherboard. Pick it up with a plastic tool.
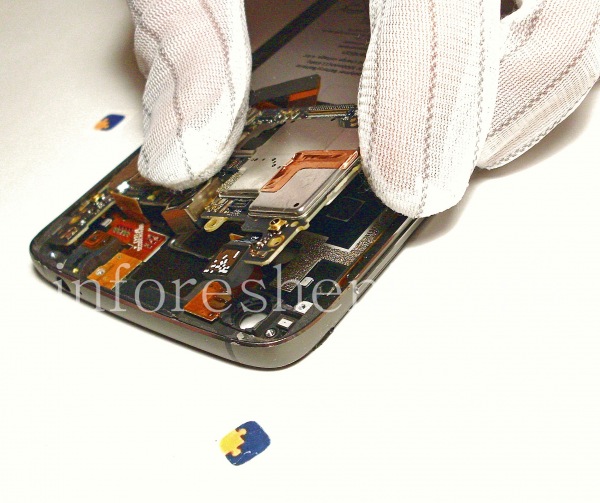
Now we remove the DTEK60 motherboard. Pick it up with a plastic tool.
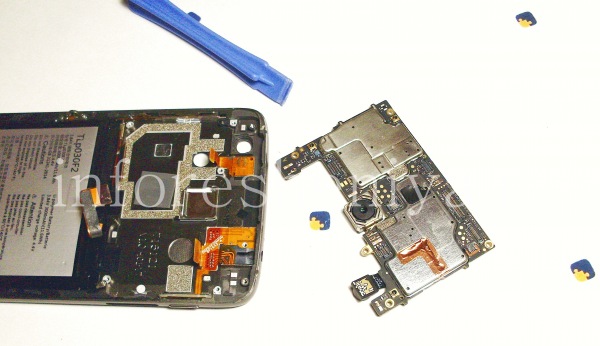
BlackBerry DTEK60 Teardown: Remove the motherboard. Be careful!
Remove the motherboard. Be careful!
BlackBerry DTEK60 Teardown: Intermediate step.
Intermediate step.
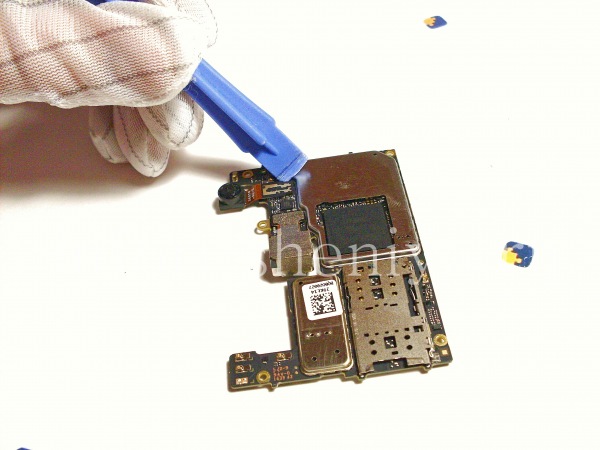
BlackBerry DTEK60 Teardown: The front camera can be removed from the motherboard..
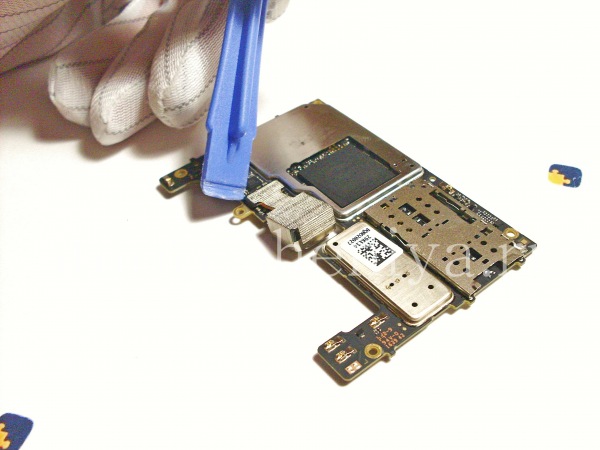
The front camera can be removed from the motherboard..
BlackBerry DTEK60 Teardown: ..and the main camera of DTEK60.
..and the main camera of DTEK60.
BlackBerry DTEK60 Teardown: Now you can remove the LED PCB.
Now you can remove the LED PCB.
BlackBerry DTEK60 Teardown: And after — the power button, an audio jack and sensors PCB. Start with the button.
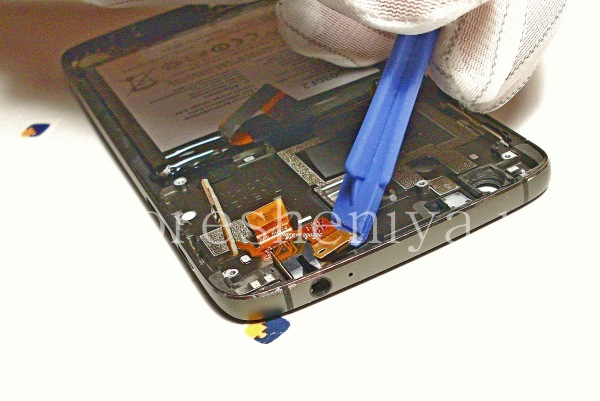
And after — the power button, an audio jack and sensors PCB. Start with the button.
BlackBerry DTEK60 Teardown: Then the sensors.
Then the sensors.
BlackBerry DTEK60 Teardown: And audio jack finally.
And audio jack finally.
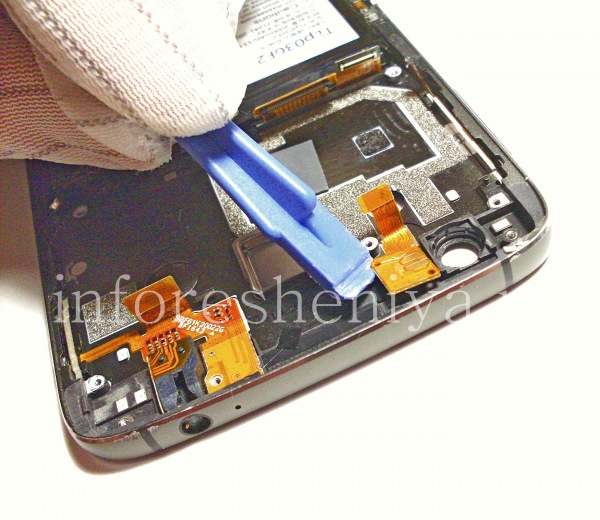
BlackBerry DTEK60 Teardown: Go to the bottom of the device. Detach the connector of the communication cable.
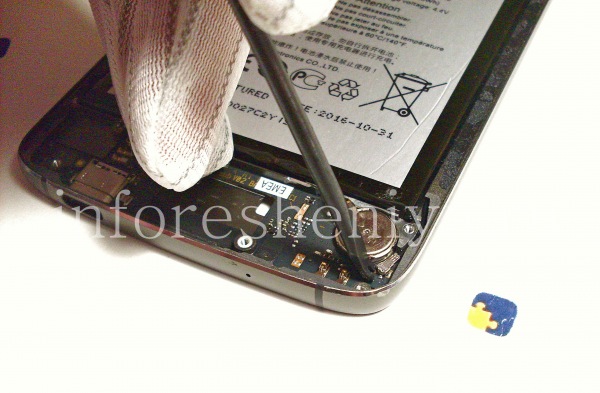
Go to the bottom of the device. Detach the connector of the communication cable.
BlackBerry DTEK60 Teardown: Then the antenna cable.
Then the antenna cable.
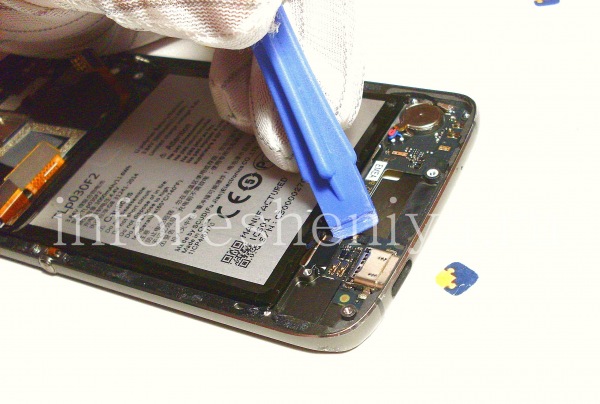
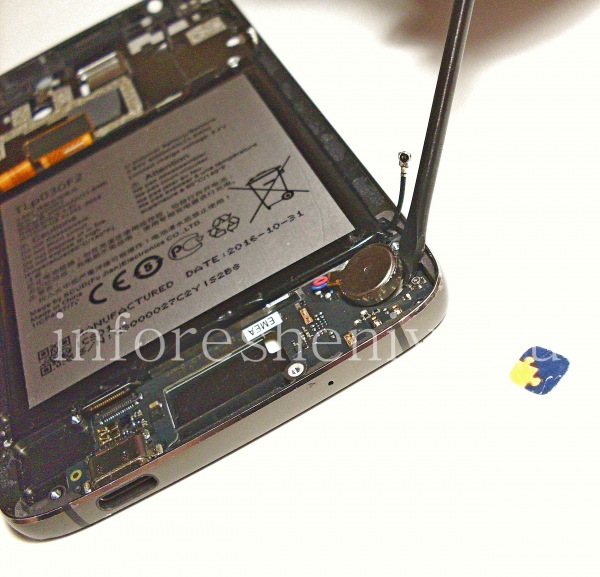
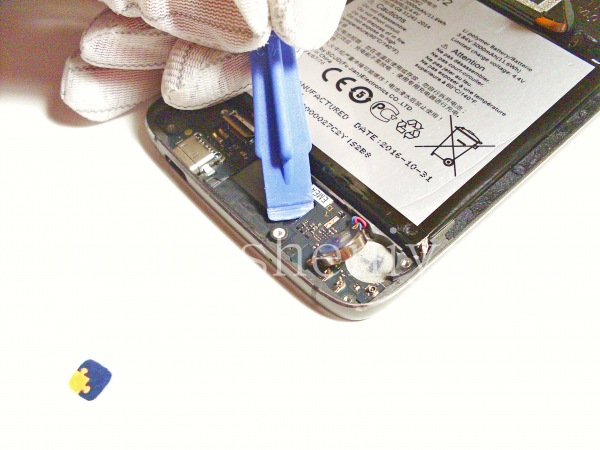
BlackBerry DTEK60 Teardown: Raise the vibration motor.
Raise the vibration motor.
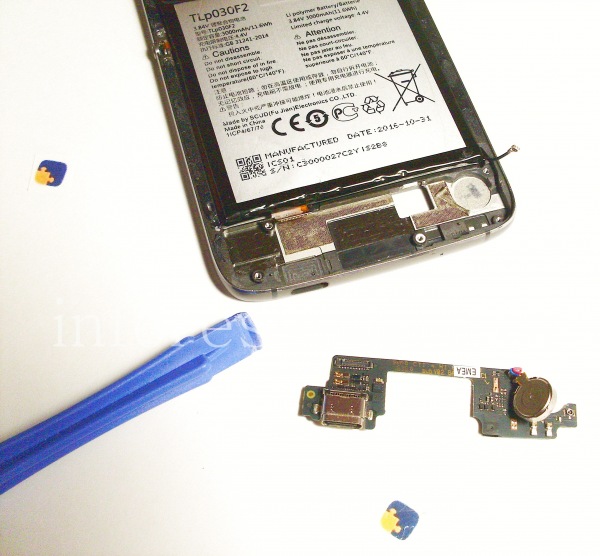
BlackBerry DTEK60 Teardown: All this PCB can now be removed.
All this PCB can now be removed.
BlackBerry DTEK60 Teardown: Here it is.
Here it is.
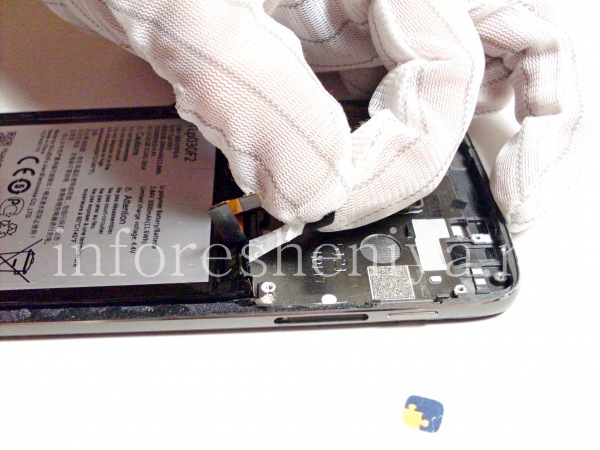
BlackBerry DTEK60 Teardown: To remove the battery, pull on the adhesive. Gently pull it out.
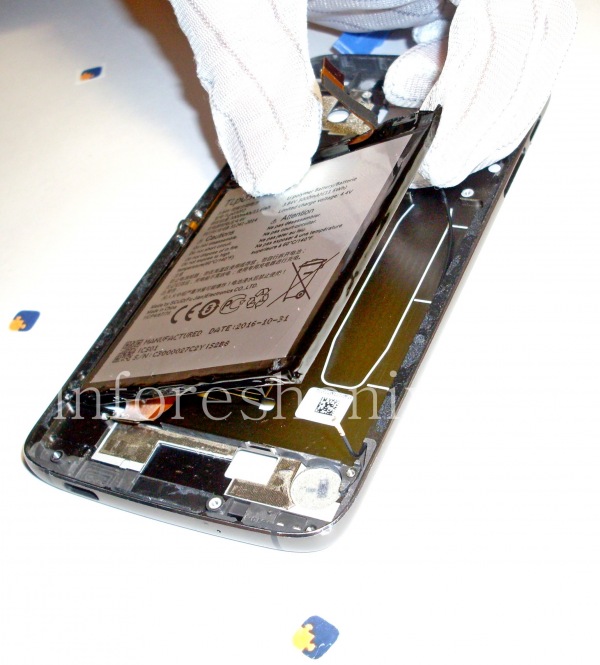
To remove the battery, pull on the adhesive. Gently pull it out.
BlackBerry DTEK60 Teardown: After that, the battery is detached from the middle part of the BlackBerry DTEK60 housing.
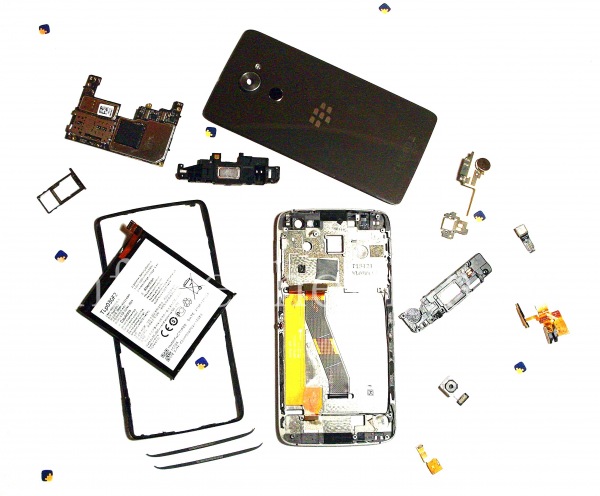
After that, the battery is detached from the middle part of the BlackBerry DTEK60 housing.
BlackBerry DTEK60 Teardown: BlackBerry DTEK60 Disassembly is complete!
BlackBerry DTEK60 Disassembly is complete!

Note: You can also remove the screen from the middle of the front. However, please note that it is strongly glued. Do this only if the screen is irreversibly damaged.